Shrimp Scampi Recipe: A Flavorful and Easy Guide

Shrimp scampi is a classic Italian-American dish that combines succulent shrimp with a rich, garlicky butter sauce and a splash of white wine. It’s a dish that feels elegant yet is surprisingly simple to make. Whether you’re preparing a romantic dinner for two, a quick weeknight meal, or impressing guests, shrimp scampi never disappoints.

In this comprehensive guide, we’ll walk you through the best shrimp scampi recipe, its variations, tips for perfection, and even how to pair it with the right side dishes and wine. Get ready to master this flavorful seafood dish!

What is Shrimp Scampi?

Shrimp scampi is a dish typically made with shrimp sautéed in butter, garlic, lemon juice, and white wine, then served over pasta or with crusty bread. The name “scampi” originally referred to a type of small lobster found in the Mediterranean, but in the United States, the dish evolved to feature shrimp cooked in the signature buttery, garlicky sauce.

Ingredients for the Perfect Shrimp Scampi

To make the best shrimp scampi, you need high-quality ingredients. Here’s what you’ll need:

Essential Ingredients:

  • 1 pound large shrimp (peeled and deveined) – Fresh or frozen shrimp work, but fresh is preferred for the best flavor.
  • 4 tablespoons unsalted butter – For that rich, silky sauce.
  • 3 tablespoons olive oil – Helps balance the butter and adds depth.
  • 5 cloves garlic (minced) – The heart of the flavor.
  • 1/2 cup dry white wine – Sauvignon Blanc or Pinot Grigio works best.
  • 1/4 teaspoon crushed red pepper flakes – For a slight heat.
  • Juice of 1 lemon – Fresh is always best.
  • 1/4 cup chopped parsley – Adds freshness.
  • Salt and black pepper (to taste) – Enhances the flavor.
  • 1/2 teaspoon Italian seasoning (optional) – Adds extra depth.
  • 1/2 cup grated Parmesan cheese (optional but delicious).
  • 12 ounces linguine or spaghetti – If serving over pasta.

Step-by-Step Instructions

Step 1: Preparing the Shrimp

If using frozen shrimp, thaw them completely by placing them in a bowl of cold water for about 15-20 minutes. Then, pat them dry with paper towels to remove excess moisture. Season lightly with salt and black pepper.

Step 2: Cooking the Pasta (If Using)

Bring a large pot of salted water to a boil and cook the linguine or spaghetti according to the package instructions until al dente. Drain and set aside, reserving about 1/2 cup of pasta water.

Step 3: Sautéing the Shrimp

In a large skillet, heat 2 tablespoons of olive oil over medium-high heat. Add the shrimp in a single layer and cook for 1-2 minutes per side until pink and opaque. Remove from the skillet and set aside.

Step 4: Making the Sauce

In the same skillet, reduce the heat to medium and add butter and the remaining olive oil. Once melted, add the minced garlic and red pepper flakes. Cook for about 30 seconds to 1 minute until fragrant (be careful not to burn the garlic).

Pour in the white wine and let it simmer for 2-3 minutes, allowing the alcohol to cook off and the flavors to develop.

Step 5: Bringing Everything Together

Return the shrimp to the skillet and toss them in the sauce. Add the lemon juice and chopped parsley, stirring to combine. If using pasta, add it to the skillet along with reserved pasta water to help coat the noodles in the sauce. Toss everything together and cook for another 1-2 minutes.

Step 6: Serve and Enjoy!

Serve immediately, garnished with freshly grated Parmesan cheese and extra parsley. Enjoy with a side of crusty bread or a simple green salad.

Tips for the Best Shrimp Scampi

  • Use fresh shrimp whenever possible for the best flavor.
  • Don’t overcook the shrimp – they cook quickly and can become rubbery if left on the heat too long.
  • Balance the flavors – lemon juice adds acidity, butter adds richness, and garlic ties everything together.
  • Use good quality wine – the flavor will be present in the final dish, so choose one you’d enjoy drinking.
  • Add pasta water – if serving over pasta, a bit of starchy pasta water helps create a smooth, silky sauce.

Variations of Shrimp Scampi

1. Garlic Butter Shrimp Scampi

Skip the wine and increase the butter and garlic for an ultra-rich version.

2. Creamy Shrimp Scampi

Add 1/2 cup of heavy cream to the sauce for a creamy texture.

3. Low-Carb Shrimp Scampi

Serve over zucchini noodles or cauliflower rice instead of pasta.

4. Spicy Shrimp Scampi

Increase the red pepper flakes or add a splash of hot sauce for extra heat.

5. Bacon Shrimp Scampi

Crisp up some chopped bacon and add it to the dish for a smoky twist.

What to Serve with Shrimp Scampi

  • Crusty Bread – Perfect for soaking up the delicious sauce.
  • Side Salad – A fresh green salad balances the richness.
  • Roasted Vegetables – Asparagus, zucchini, or bell peppers work well.
  • Garlic Bread – Because more garlic is always a good idea.

Wine Pairing for Shrimp Scampi

Since shrimp scampi has a buttery, garlicky profile, it pairs best with white wines like:

  • Sauvignon Blanc – Crisp acidity complements the dish.
  • Pinot Grigio – Light and refreshing.
  • Chardonnay – A buttery, oaked Chardonnay enhances the richness.

Frequently Asked Questions

1. Can I Make Shrimp Scampi Without Wine?

Yes! Simply replace the wine with chicken broth or seafood stock.

2. Can I Use Frozen Shrimp?

Absolutely! Just make sure to thaw them completely before cooking.

3. Can I Make This Dish Ahead of Time?

It’s best served fresh, but you can prep the ingredients ahead and cook quickly when ready.

4. How Do I Store Leftovers?

Store leftovers in an airtight container in the refrigerator for up to 2 days. Reheat gently to avoid overcooking the shrimp.

Final Thoughts

Shrimp scampi is a simple yet elegant dish that never fails to impress. Whether served over pasta, with bread, or on its own, its bold flavors and rich texture make it a favorite for seafood lovers. Try this recipe, experiment with variations, and enjoy the deliciousness of homemade shrimp scampi!

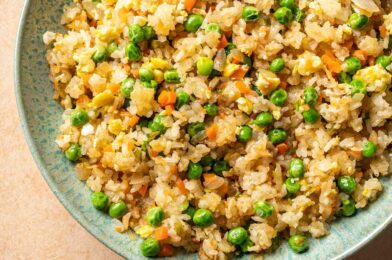
Fried Rice Recipe: A Complete Guide to Making the Perfect Fried Rice

Fried rice is one of the most popular and versatile dishes around the world. Found in Asian cuisine, from Chinese takeout to Thai street food, fried rice is a dish that transforms simple ingredients into something incredibly flavorful. Whether you are using leftover rice or cooking a fresh batch, the beauty of fried rice lies in its adaptability. This guide will walk you through the history, ingredients, cooking techniques, variations, and a step-by-step fried rice recipe that will leave your taste buds wanting more.

The History of Fried Rice

Fried rice originated in China and has been a staple of Chinese cuisine for over a thousand years. It was first created as a way to use up leftover rice and prevent food waste. The classic Yangzhou Fried Rice, originating from Jiangsu province, is one of the most well-known versions, often made with shrimp, char siu (Chinese BBQ pork), and eggs.

Over time, different countries adapted fried rice into their own culinary traditions. Thai fried rice, Japanese chahan, Indonesian nasi goreng, and Korean kimchi fried rice are just a few examples of how this simple dish has evolved worldwide.

Why You Should Make Fried Rice at Home

1. Cost-Effective

Fried rice is an affordable meal that makes use of pantry staples and leftovers.

2. Quick and Easy

In less than 30 minutes, you can prepare a delicious and satisfying meal.

3. Customizable

You can add proteins, vegetables, and seasonings based on your preference.

4. Healthier Than Takeout

By making fried rice at home, you control the ingredients and avoid excessive oils and additives.

Essential Ingredients for Fried Rice

To create the perfect fried rice, you need the right ingredients. Below are the essentials:

1. Rice

  • Day-old rice works best as it’s drier and prevents mushy fried rice.
  • Use jasmine rice for Thai-style fried rice, short-grain rice for Japanese chahan, or long-grain rice for Chinese-style fried rice.

2. Protein

  • Chicken, shrimp, beef, or tofu
  • Ham, bacon, or Chinese sausage
  • Eggs (a classic component in most fried rice recipes)

3. Vegetables

  • Green onions
  • Carrots, peas, and corn (frozen mixed vegetables work well)
  • Bell peppers, mushrooms, and bean sprouts

4. Aromatics & Seasonings

  • Garlic and onions for depth of flavor
  • Soy sauce (light and dark for balance)
  • Oyster sauce for umami
  • Sesame oil for fragrance
  • Salt and pepper

How to Make the Perfect Fried Rice: Step-by-Step Guide

Step 1: Prepare Your Ingredients

  • Dice your protein and vegetables into small, uniform pieces.
  • Mince garlic and onions.
  • Beat eggs in a separate bowl.

Step 2: Cook the Protein

  • Heat a wok or large skillet over medium-high heat.
  • Add oil and cook your chosen protein until golden brown. Remove and set aside.

Step 3: Scramble the Eggs

  • In the same pan, add a little more oil.
  • Pour in beaten eggs and scramble them. Remove and set aside.

Step 4: Stir-Fry the Vegetables

  • Add more oil if needed and sauté onions and garlic until fragrant.
  • Toss in the vegetables and stir-fry for 2–3 minutes.

Step 5: Add the Rice

  • Break apart the cold rice to avoid clumps.
  • Add rice to the pan and stir-fry for a few minutes.

Step 6: Combine Everything

  • Return the cooked protein and eggs to the pan.
  • Add soy sauce, oyster sauce, salt, and pepper.
  • Stir-fry everything together for a few more minutes until well combined.

Step 7: Finishing Touches

  • Drizzle a little sesame oil for added fragrance.
  • Garnish with chopped green onions and serve hot.

Popular Variations of Fried Rice

1. Chicken Fried Rice

  • Uses diced chicken breast or thigh meat for added juiciness.

2. Shrimp Fried Rice

  • Fresh or frozen shrimp adds a delicious seafood flavor.

3. Vegetable Fried Rice

  • Perfect for vegetarians, featuring a mix of fresh and frozen vegetables.

4. Thai Pineapple Fried Rice

  • A sweet and savory twist with pineapple chunks and curry powder.

5. Kimchi Fried Rice

  • Spicy and tangy with the umami flavor of fermented kimchi.

6. Nasi Goreng (Indonesian Fried Rice)

  • Uses kecap manis (sweet soy sauce) and is often topped with a fried egg.

7. Japanese Chahan

  • Features short-grain rice, soy sauce, and sometimes Kewpie mayo for richness.

Tips and Tricks for the Best Fried Rice

1. Use Cold, Day-Old Rice

Fresh rice is too moist and can become mushy when stir-fried.

2. High Heat is Key

A hot pan ensures that the rice fries properly instead of steaming.

3. Don’t Overload the Pan

Too many ingredients at once can lower the pan’s temperature and cause soggy fried rice.

4. Stir-Fry in Stages

Cooking each component separately helps maintain the right texture and prevents overcooking.

5. Add Sauces Gradually

Too much soy sauce at once can make the rice too salty and wet.

Serving Suggestions

Fried rice is best served hot and can be paired with:

  • Spring rolls for a crispy contrast
  • Sweet and sour chicken for extra protein
  • Steamed dumplings for a delicious side dish

Conclusion

Fried rice is an easy yet flavorful dish that you can make at home in countless ways. Whether you prefer the classic Chinese-style fried rice, a spicy kimchi version, or a sweet and savory pineapple variation, this dish is endlessly adaptable. By following the right techniques and using quality ingredients, you can create a restaurant-quality fried rice that is healthier, tastier, and more satisfying than takeout.

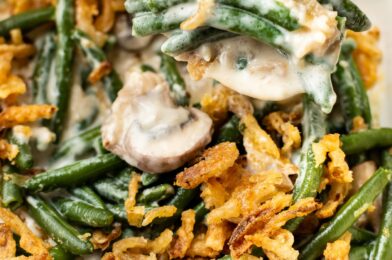
The Ultimate Green Bean Casserole Recipe: A Comfort Food Classic

Green bean casserole is one of those dishes that brings nostalgia to the table. Whether it’s Thanksgiving, Christmas, or just a cozy family dinner, this creamy, crunchy, and utterly delicious dish has earned a permanent place in American cuisine. The combination of tender green beans, a rich and savory cream sauce, and crispy fried onions makes this casserole a go-to comfort food.

In this post, we’ll dive deep into the origins of green bean casserole, the best ingredients to use, various preparation methods, and some pro tips to elevate your dish. Plus, we’ll share some delightful variations to suit different dietary needs. Let’s get cooking!

The History of Green Bean Casserole

Did you know that green bean casserole has a fascinating history? This dish was created in 1955 by Dorcas Reilly, a home economist working for the Campbell Soup Company. The original recipe was simple, designed for busy homemakers who needed a quick and delicious dish using pantry staples. Campbell’s Cream of Mushroom Soup played a crucial role in making the casserole rich and creamy without requiring an extensive ingredient list.

Over the decades, green bean casserole has evolved, with many home cooks adding their own touches to enhance the flavors and textures. Today, it remains a beloved dish, often making appearances at holiday feasts and potlucks.

Why You’ll Love This Green Bean Casserole Recipe

  • Easy to make – This recipe requires simple ingredients and minimal prep.
  • Deliciously creamy – The homemade sauce is packed with flavor, ensuring each bite is rich and comforting.
  • Crispy topping – The combination of crispy fried onions adds a satisfying crunch.
  • Perfect for gatherings – Whether it’s a holiday feast or a family dinner, this casserole is a crowd-pleaser.

Ingredients for the Best Green Bean Casserole

To make the ultimate green bean casserole, you’ll need the following ingredients:

For the Green Bean Base:

  • 1 ½ pounds fresh green beans (or 2 cans of cut green beans, drained)
  • 4 cups water (for blanching)
  • 1 teaspoon salt

For the Creamy Mushroom Sauce:

  • 2 tablespoons butter
  • 1 small onion, finely chopped
  • 2 cloves garlic, minced
  • 8 ounces mushrooms, sliced
  • 2 tablespoons all-purpose flour
  • 1 cup whole milk
  • 1 cup heavy cream
  • 1 teaspoon Worcestershire sauce
  • ½ teaspoon black pepper
  • ½ teaspoon salt
  • ½ teaspoon smoked paprika (optional)
  • ½ teaspoon thyme (optional)

For the Crispy Topping:

  • 1 ½ cups crispy fried onions
  • ½ cup grated Parmesan cheese (optional for extra flavor)
  • ¼ cup panko breadcrumbs (for extra crunch)

How to Make Green Bean Casserole from Scratch

Step 1: Prepare the Green Beans

  1. If using fresh green beans, trim the ends and cut them into 2-inch pieces.
  2. Bring a large pot of water to a boil, add salt, and blanch the green beans for 3-4 minutes. Drain and transfer them to an ice bath to stop cooking. Set aside.

Step 2: Make the Creamy Mushroom Sauce

  1. In a large skillet, melt the butter over medium heat.
  2. Add the onions and garlic, cooking until softened.
  3. Stir in the mushrooms and cook until they release their moisture and become golden brown.
  4. Sprinkle the flour over the mushrooms and stir for about a minute to cook out the raw flour taste.
  5. Gradually add the milk and heavy cream, stirring constantly until the mixture thickens.
  6. Add Worcestershire sauce, salt, pepper, smoked paprika, and thyme.
  7. Remove from heat once the sauce is thick and creamy.

Step 3: Assemble the Casserole

  1. Preheat your oven to 375°F (190°C).
  2. In a large mixing bowl, combine the green beans with the mushroom sauce.
  3. Transfer the mixture to a greased 9×13-inch baking dish.
  4. Sprinkle the crispy fried onions, Parmesan cheese, and panko breadcrumbs on top.

Step 4: Bake to Perfection

  1. Bake uncovered for 20-25 minutes or until the topping is golden brown and the casserole is bubbling.
  2. Let it cool slightly before serving.

Pro Tips for the Best Green Bean Casserole

  • Use fresh green beans – Canned beans work, but fresh green beans provide the best texture and flavor.
  • Make it ahead – You can prepare the casserole a day in advance and refrigerate it. Add the crispy onions just before baking.
  • Add cheese – A bit of shredded cheddar or Gruyère cheese can make the casserole even more indulgent.
  • Go homemade – If you want to avoid using canned cream of mushroom soup, the homemade sauce in this recipe is a fantastic substitute.

Variations to Try

1. Vegan Green Bean Casserole

  • Use dairy-free butter and milk alternatives such as almond or oat milk.
  • Substitute the heavy cream with coconut cream for a rich texture.
  • Use homemade crispy onions or a plant-based version.

2. Keto Green Bean Casserole

  • Replace the all-purpose flour with almond flour or xanthan gum.
  • Use a full-fat cream cheese base for the sauce instead of milk and flour.
  • Skip the panko breadcrumbs and use crushed pork rinds for the topping.

3. Gluten-Free Green Bean Casserole

  • Use cornstarch instead of flour to thicken the sauce.
  • Ensure that the crispy onions and panko are gluten-free alternatives.

4. Spicy Green Bean Casserole

  • Add a dash of cayenne pepper or red pepper flakes to the mushroom sauce.
  • Use spicy crispy jalapeños as a topping along with the fried onions.

What to Serve with Green Bean Casserole

Green bean casserole pairs beautifully with a variety of dishes, including:

  • Roast turkey or chicken – A Thanksgiving favorite.
  • Mashed potatoes – Creamy and buttery mashed potatoes complement the dish perfectly.
  • Stuffing – Adds another layer of comforting flavors to your meal.
  • Cranberry sauce – Provides a sweet and tangy contrast.
  • Dinner rolls – Great for soaking up any leftover sauce.

Frequently Asked Questions

1. Can I Make Green Bean Casserole Ahead of Time?

Yes! Assemble the casserole (without the crispy onions) and refrigerate it for up to 24 hours. Add the onions and bake when ready.

2. Can I Freeze Green Bean Casserole?

Yes! Freeze the casserole before baking. When ready to serve, bake from frozen at 375°F for about 40-45 minutes.

3. How Can I Make It Healthier?

Use low-fat milk, swap heavy cream for Greek yogurt, and reduce the amount of fried onions.

Final Thoughts

Green bean casserole is a dish that brings warmth, comfort, and nostalgia to the table. Whether you’re making it for a holiday or just a simple weeknight dinner, this recipe ensures a delicious, creamy, and crispy casserole every time. Try it out and let us know how it turned out!

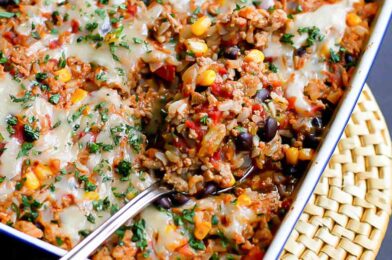
Ground Turkey Recipes: Healthy, Delicious, and Easy to Make

Ground turkey is a versatile, lean, and protein-packed ingredient that can be used in countless recipes. Whether you’re looking for quick weeknight dinners, healthy meal prep ideas, or comfort food with a nutritious twist, ground turkey has you covered. In this guide, we’ll explore the best ground turkey recipes, cooking tips, and ways to enhance its flavor.

Why Choose Ground Turkey?

Ground turkey is a great alternative to ground beef or pork for several reasons:

  • Lower in fat: It contains less saturated fat, making it a heart-healthy choice.
  • High in protein: A 4-ounce serving provides about 22 grams of protein.
  • Versatile: It can be used in burgers, soups, casseroles, tacos, and more.
  • Affordable: Generally, it’s budget-friendly compared to other meats.
  • Mild flavor: It absorbs seasonings well, making it easy to customize for different cuisines.

Now, let’s dive into some of the best ground turkey recipes you can try!

1. Classic Ground Turkey Chili

Chili is a comforting and protein-rich dish that works great with ground turkey.

Ingredients:

  • 1 lb ground turkey
  • 1 small onion, chopped
  • 1 bell pepper, chopped
  • 2 cloves garlic, minced
  • 1 can (15 oz) kidney beans, drained
  • 1 can (15 oz) black beans, drained
  • 1 can (28 oz) diced tomatoes
  • 1 cup chicken broth
  • 1 tbsp chili powder
  • 1 tsp cumin
  • 1/2 tsp paprika
  • Salt and pepper to taste
  • 1 tbsp olive oil

Instructions:

  1. Heat olive oil in a large pot over medium heat.
  2. Add onion, bell pepper, and garlic. Sauté until softened.
  3. Add ground turkey and cook until browned.
  4. Stir in chili powder, cumin, paprika, salt, and pepper.
  5. Pour in diced tomatoes, beans, and chicken broth. Stir well.
  6. Simmer for 30 minutes, stirring occasionally.
  7. Serve hot with toppings like shredded cheese, sour cream, and avocado.

2. Healthy Turkey Meatballs

These meatballs are perfect for pasta, subs, or even as a snack.

Ingredients:

  • 1 lb ground turkey
  • 1/2 cup breadcrumbs
  • 1/4 cup Parmesan cheese
  • 1 egg
  • 2 cloves garlic, minced
  • 1 tbsp Italian seasoning
  • 1/2 tsp salt
  • 1/2 tsp black pepper
  • 1 tbsp olive oil
  • 1 cup marinara sauce (for serving)

Instructions:

  1. Preheat oven to 400°F (200°C).
  2. In a large bowl, mix ground turkey, breadcrumbs, Parmesan, egg, garlic, and seasonings.
  3. Form into small meatballs and place on a lined baking sheet.
  4. Drizzle olive oil over the meatballs.
  5. Bake for 20 minutes or until cooked through.
  6. Serve with marinara sauce and pasta, or enjoy as is!

3. Ground Turkey Tacos

A delicious and healthy taco night option!

Ingredients:

  • 1 lb ground turkey
  • 1 packet taco seasoning
  • 1/2 cup water
  • 8 small corn tortillas
  • 1 cup shredded lettuce
  • 1/2 cup diced tomatoes
  • 1/2 cup shredded cheese
  • 1/4 cup sour cream
  • 1/4 cup salsa
  • 1 tbsp olive oil

Instructions:

  1. Heat olive oil in a skillet over medium heat.
  2. Add ground turkey and cook until browned.
  3. Stir in taco seasoning and water. Simmer for 5 minutes.
  4. Warm tortillas in a dry pan or microwave.
  5. Fill each tortilla with turkey mixture, then top with lettuce, tomatoes, cheese, sour cream, and salsa.
  6. Serve immediately.

4. Ground Turkey Stuffed Peppers

A nutritious meal that’s easy to prepare and full of flavor.

Ingredients:

  • 4 bell peppers (any color)
  • 1 lb ground turkey
  • 1 small onion, diced
  • 1 cup cooked rice
  • 1 can (15 oz) diced tomatoes
  • 1/2 cup shredded cheese
  • 1 tsp garlic powder
  • 1 tsp Italian seasoning
  • Salt and pepper to taste
  • 1 tbsp olive oil

Instructions:

  1. Preheat oven to 375°F (190°C).
  2. Cut tops off peppers and remove seeds.
  3. Heat olive oil in a skillet. Sauté onion, then add ground turkey and cook until browned.
  4. Stir in rice, tomatoes, garlic powder, Italian seasoning, salt, and pepper.
  5. Fill peppers with the turkey mixture and top with cheese.
  6. Place in a baking dish, cover with foil, and bake for 30 minutes.
  7. Remove foil and bake for another 10 minutes until cheese is melted.
  8. Serve warm.

5. Turkey and Sweet Potato Skillet

A quick, healthy, and one-pan meal.

Ingredients:

  • 1 lb ground turkey
  • 1 large sweet potato, diced
  • 1 small onion, diced
  • 1 bell pepper, diced
  • 2 cloves garlic, minced
  • 1 tsp cumin
  • 1/2 tsp paprika
  • Salt and pepper to taste
  • 1 tbsp olive oil

Instructions:

  1. Heat olive oil in a large skillet over medium heat.
  2. Add onion, bell pepper, and garlic. Sauté for 3 minutes.
  3. Add ground turkey and cook until browned.
  4. Stir in diced sweet potato and seasonings.
  5. Cover and cook for 10-15 minutes, stirring occasionally, until sweet potatoes are tender.
  6. Serve hot.

6. Turkey Zucchini Burgers

A healthy alternative to beef burgers with added veggies.

Ingredients:

  • 1 lb ground turkey
  • 1 cup grated zucchini
  • 1/4 cup breadcrumbs
  • 1 egg
  • 2 cloves garlic, minced
  • 1/2 tsp salt
  • 1/2 tsp black pepper
  • 1 tbsp olive oil

Instructions:

  1. Squeeze excess moisture from grated zucchini.
  2. In a bowl, mix turkey, zucchini, breadcrumbs, egg, garlic, salt, and pepper.
  3. Form into patties.
  4. Heat olive oil in a pan and cook patties for 4-5 minutes per side.
  5. Serve on buns with toppings of choice.

Final Thoughts

Ground turkey is an excellent protein choice that works in many dishes. Whether you’re craving comfort food or looking for healthy meal options, these recipes offer delicious ways to incorporate ground turkey into your diet. Try one today and enjoy a nutritious, flavorful meal!

Old Fashioned Recipes: A Nostalgic Culinary Journey

There is something truly special about old-fashioned recipes. They take us back in time, reminding us of the comforting aromas of our grandmother’s kitchen and the flavors of homemade meals prepared with love. In today’s fast-paced world, where convenience foods and takeout dominate, traditional recipes bring us back to the roots of cooking—simple ingredients, time-honored techniques, and the satisfaction of creating meals from scratch.

In this blog post, we’ll explore a variety of old-fashioned recipes that have stood the test of time. Whether you’re looking for a classic breakfast, a hearty dinner, or a nostalgic dessert, we’ve got you covered with over 4,000 words of culinary nostalgia.

The Charm of Old-Fashioned Cooking

Before diving into the recipes, let’s take a moment to appreciate what makes old-fashioned cooking so special. Unlike modern recipes that often rely on pre-packaged ingredients, traditional cooking emphasizes the use of fresh, whole foods. Many of these recipes have been passed down through generations, making them an important part of family traditions.

Key Elements of Old-Fashioned Recipes:

  • Simple, wholesome ingredients – Many classic recipes use butter, flour, sugar, eggs, and fresh produce.
  • Slow cooking methods – Many dishes require simmering, baking, or braising for hours, enhancing flavors.
  • Handmade touch – From rolling out dough to hand-mixing batters, these recipes require a personal touch.
  • Rich, comforting flavors – Unlike highly processed foods, old-fashioned meals are known for their depth of flavor.

Now, let’s dive into some timeless recipes that bring warmth and nostalgia to the table.

Classic Old-Fashioned Breakfast Recipes

1. Buttermilk Pancakes

These fluffy, golden pancakes have been a breakfast staple for centuries.

Ingredients:

  • 2 cups all-purpose flour
  • 2 tbsp sugar
  • 2 tsp baking powder
  • 1/2 tsp baking soda
  • 1/2 tsp salt
  • 2 cups buttermilk
  • 2 eggs
  • 1/4 cup unsalted butter, melted

Instructions:

  1. In a large bowl, mix the flour, sugar, baking powder, baking soda, and salt.
  2. In another bowl, whisk the buttermilk, eggs, and melted butter.
  3. Pour the wet ingredients into the dry ingredients and mix until just combined.
  4. Heat a griddle or pan over medium heat and grease with butter.
  5. Pour batter onto the pan and cook until bubbles form. Flip and cook the other side.
  6. Serve with maple syrup and butter.

2. Country Biscuits and Gravy

A Southern favorite, biscuits and gravy make for a hearty start to the day.

Ingredients for Biscuits:

  • 2 cups all-purpose flour
  • 1 tbsp baking powder
  • 1/2 tsp salt
  • 1/2 cup cold butter, cubed
  • 3/4 cup buttermilk

Ingredients for Gravy:

  • 1 lb breakfast sausage
  • 1/4 cup all-purpose flour
  • 2 1/2 cups whole milk
  • Salt and pepper to taste

Instructions:

  1. Preheat oven to 425°F (220°C).
  2. In a bowl, mix flour, baking powder, and salt. Cut in butter until the mixture is crumbly.
  3. Stir in buttermilk until dough forms. Roll out and cut biscuits.
  4. Bake for 12-15 minutes until golden brown.
  5. For the gravy, cook sausage in a skillet until browned. Stir in flour and cook for 1 minute.
  6. Gradually add milk, stirring constantly, until thickened. Season with salt and pepper.
  7. Serve over warm biscuits.

Hearty Old-Fashioned Dinner Recipes

3. Classic Meatloaf

Meatloaf is a nostalgic comfort food that remains a family favorite.

Ingredients:

  • 1 1/2 lbs ground beef
  • 1 cup breadcrumbs
  • 1 small onion, finely chopped
  • 1/2 cup milk
  • 1 egg
  • 2 tbsp Worcestershire sauce
  • 1/2 cup ketchup
  • Salt and pepper to taste

Instructions:

  1. Preheat oven to 375°F (190°C).
  2. In a bowl, mix ground beef, breadcrumbs, onion, milk, egg, Worcestershire sauce, salt, and pepper.
  3. Shape into a loaf and place in a baking dish.
  4. Spread ketchup on top and bake for 1 hour.
  5. Let rest before slicing and serving.

4. Homemade Chicken Pot Pie

A creamy, flaky dish perfect for cozy evenings.

Ingredients:

  • 2 cups cooked, shredded chicken
  • 1 cup frozen peas and carrots
  • 1/3 cup butter
  • 1/3 cup all-purpose flour
  • 1 3/4 cups chicken broth
  • 2/3 cup milk
  • 1 package refrigerated pie crusts

Instructions:

  1. Preheat oven to 425°F (220°C).
  2. In a pan, melt butter and stir in flour, creating a roux.
  3. Gradually add broth and milk, stirring until thickened.
  4. Stir in chicken, peas, and carrots.
  5. Pour mixture into a pie crust-lined dish. Top with second crust and seal edges.
  6. Bake for 30-35 minutes until golden brown.
  7. Let cool before serving.

Timeless Old-Fashioned Desserts

5. Grandma’s Apple Pie

A perfect blend of sweet, tart, and buttery goodness.

Ingredients:

  • 2 1/2 cups all-purpose flour
  • 1 cup butter, chilled and diced
  • 1/2 tsp salt
  • 6 tbsp ice water
  • 6 cups sliced apples
  • 3/4 cup sugar
  • 2 tsp cinnamon

Instructions:

  1. Preheat oven to 375°F (190°C).
  2. Prepare crust by mixing flour, butter, and salt. Add ice water and form dough.
  3. Roll out dough and place in a pie pan.
  4. Mix apples, sugar, and cinnamon. Pour into crust.
  5. Cover with top crust and crimp edges.
  6. Bake for 50-55 minutes until golden brown.

Conclusion

Old-fashioned recipes bring comfort, nostalgia, and the joy of homemade cooking to our lives. Whether you’re making pancakes on a lazy Sunday morning, serving up a warm slice of meatloaf, or indulging in a slice of homemade apple pie, these dishes connect us to generations past and remind us of the simple joys of cooking.

Pastina Recipe: The Ultimate Comfort Food Guide

Pastina is the ultimate comfort food, a warm and cozy dish that brings back childhood memories for many. This tiny pasta, often the first solid food given to Italian children, is a staple in many households. Whether you are feeling under the weather, need a quick and easy meal, or just want something nostalgic, pastina is the answer. In this guide, we will explore everything about pastina—its history, variations, and, most importantly, a detailed recipe to help you make the best bowl of this classic dish.

What is Pastina?

Pastina, which translates to “little pasta” in Italian, is a term used for the smallest shapes of pasta. Traditionally made from semolina flour, pastina comes in various shapes, including tiny stars, circles, or dots.

Many Italians grew up eating pastina prepared with simple ingredients like butter, cheese, and sometimes a bit of broth. It’s a meal that soothes the soul and fills you with warmth, making it a popular dish for both children and adults alike.

The History of Pastina

Pastina has deep roots in Italian cuisine. For centuries, Italian families have used it as a nutritious meal for young children and the sick due to its easy-to-digest properties. The tradition of making pastina has been passed down through generations, with each family having its own special way of preparing it.

In the United States, pastina became widely available thanks to Italian immigrants who brought their love of pasta with them. Today, it remains a cherished dish in Italian-American households and is a quick go-to meal for those craving comfort food.

The Best Ingredients for Pastina

The beauty of pastina is in its simplicity. Here are the key ingredients for making a classic pastina dish:

Basic Ingredients:

  • Pastina Pasta – You can use traditional star-shaped pastina or other tiny pasta like acini di pepe or orzo.
  • Water or Broth – Cooking pastina in broth adds extra flavor.
  • Butter – A small knob of butter makes the dish creamy and rich.
  • Parmesan Cheese – Adds a salty, umami flavor that enhances the dish.
  • Salt and Pepper – For seasoning.

Optional Additions:

  • Milk or Heavy Cream – Makes the dish extra creamy.
  • Egg – Adds protein and a silky texture when stirred in.
  • Vegetables – Peas, carrots, or spinach can add color and nutrition.
  • Protein – Shredded chicken or soft scrambled egg can be added for more substance.

How to Make Classic Pastina

Ingredients:

  • 1 cup pastina pasta
  • 2 cups water or chicken broth
  • 1 tbsp butter
  • 1/4 cup grated Parmesan cheese
  • Salt and pepper to taste

Instructions:

  1. Boil the Water or Broth: In a medium saucepan, bring the liquid to a gentle boil over medium heat.
  2. Cook the Pastina: Add the pastina and stir occasionally to prevent sticking. Cook according to the package instructions (usually around 5-7 minutes).
  3. Drain (if necessary): If there’s too much liquid left, drain a little but leave some to keep it creamy.
  4. Stir in Butter and Cheese: Mix in the butter until melted, then stir in the Parmesan cheese.
  5. Season and Serve: Add salt and pepper to taste. Enjoy warm!

Variations of Pastina

1. Creamy Pastina

For a creamier dish, cook pastina in a mixture of milk and broth, then stir in extra butter and Parmesan cheese. This makes a deliciously smooth and comforting meal.

2. Egg Drop Pastina

Once the pastina is fully cooked, slowly stir in a beaten egg while stirring continuously. The egg will cook in the residual heat, creating a velvety texture similar to egg drop soup.

3. Pastina with Vegetables

Adding peas, carrots, or baby spinach boosts the nutritional value of the dish. Simply toss the veggies in during the last few minutes of cooking.

4. Pastina with Chicken

For extra protein, add shredded cooked chicken to your pastina. This turns it into a heartier meal.

5. Pastina Soup

Cook pastina directly in a light chicken or vegetable broth, making it a quick and easy soup perfect for cold days.

Tips for Making the Best Pastina

  • Use high-quality Parmesan cheese for the best flavor.
  • Adjust the liquid ratio depending on your preference—more liquid makes it soupy, while less makes it thicker.
  • Cook pastina in broth instead of water for more flavor.
  • Always stir while cooking to prevent the tiny pasta from sticking together.

Why You Should Try Pastina

  • Easy to Make: It takes less than 10 minutes to prepare.
  • Comforting and Warm: The ultimate meal for when you need something soothing.
  • Kid-Friendly: A great first pasta dish for young children.
  • Versatile: Can be customized with different ingredients to suit any taste.

Conclusion

Pastina is a simple yet delightful dish that holds a special place in many hearts. Whether you enjoy it plain with butter and cheese or elevate it with add-ins like eggs, vegetables, or chicken, pastina is the ultimate comfort food. Try this recipe today and discover why it remains a favorite across generations.

Deviled Eggs Recipe: The Ultimate Guide to Perfect Deviled Eggs

Introduction

Deviled eggs are a classic appetizer that never goes out of style. Whether you’re preparing them for a family gathering, a holiday party, or just as a tasty snack, deviled eggs are always a hit. These bite-sized delights are creamy, tangy, and packed with flavor, making them a favorite for all occasions.

In this ultimate guide, we will walk you through everything you need to know about making perfect deviled eggs. From the basic recipe to creative variations, pro tips, and troubleshooting common mistakes, this post covers it all.

The History of Deviled Eggs

Deviled eggs have been enjoyed for centuries, dating back to ancient Rome. The term “deviled” was first used in the 18th century to describe spicy or zesty foods. Over time, the recipe has evolved, incorporating different flavors and regional twists. Today, deviled eggs are a staple at gatherings worldwide, and their versatility makes them an exciting dish to experiment with.

Ingredients for Classic Deviled Eggs

To make traditional deviled eggs, you’ll need just a few simple ingredients:

  • Eggs – 6 large eggs
  • Mayonnaise – 1/4 cup for a creamy texture
  • Mustard – 1 teaspoon (Dijon or yellow mustard for tangy flavor)
  • Vinegar – 1 teaspoon (white vinegar or apple cider vinegar enhances flavor)
  • Salt – 1/4 teaspoon
  • Black Pepper – 1/8 teaspoon
  • Paprika – For garnish
  • Chives or Parsley – Optional garnish for a fresh touch

How to Make Deviled Eggs

Step 1: Hard Boiling the Eggs

A perfect deviled egg starts with perfectly boiled eggs. Here’s the foolproof method:

  1. Place the eggs in a saucepan and cover them with cold water.
  2. Bring the water to a rolling boil over medium-high heat.
  3. Once boiling, turn off the heat and cover the pot.
  4. Let the eggs sit for 12 minutes.
  5. Transfer the eggs to an ice water bath for 5 minutes to stop the cooking process.
  6. Gently tap and peel the eggs under running water.

Step 2: Preparing the Filling

  1. Slice the boiled eggs in half lengthwise.
  2. Carefully remove the yolks and place them in a mixing bowl.
  3. Mash the yolks with a fork until smooth.
  4. Add mayonnaise, mustard, vinegar, salt, and black pepper. Mix until creamy.

Step 3: Assembling the Deviled Eggs

  1. Spoon or pipe the yolk mixture back into the egg whites.
  2. Sprinkle paprika over the top.
  3. Garnish with chives or parsley for extra flavor and presentation.

Variations and Creative Twists

Deviled eggs can be customized in endless ways. Here are some unique variations to try:

1. Bacon Deviled Eggs

  • Add 2 slices of crumbled crispy bacon to the yolk mixture.
  • Garnish with extra bacon bits.

2. Spicy Sriracha Deviled Eggs

  • Add 1 teaspoon of sriracha sauce to the filling.
  • Garnish with a tiny drizzle of sriracha for extra heat.

3. Avocado Deviled Eggs

  • Replace half the mayonnaise with mashed avocado.
  • Squeeze in fresh lime juice for a bright flavor.

4. Buffalo Ranch Deviled Eggs

  • Mix in 1 tablespoon of ranch dressing and 1 teaspoon of hot sauce.
  • Top with blue cheese crumbles for a buffalo wing-inspired taste.

5. Smoked Salmon Deviled Eggs

  • Add finely chopped smoked salmon to the yolk mixture.
  • Garnish with capers and fresh dill.

Tips for the Best Deviled Eggs

  • Use fresh eggs but not too fresh—slightly older eggs peel easier.
  • Cool the eggs quickly after boiling to prevent overcooking.
  • Use a piping bag for a neat and professional look.
  • Adjust seasoning to taste—some people prefer extra tangy or spicy flavors.
  • Refrigerate before serving for the best taste and texture.

Common Mistakes and How to Fix Them

1. Eggs Are Hard to Peel

  • Use eggs that are at least 5-7 days old.
  • Peel under running water for easier removal.

2. Filling Is Too Runny

  • Add more egg yolks or reduce mayonnaise.
  • Refrigerate the filling for 10 minutes before piping.

3. Eggs Have a Greenish Yolk

  • This happens when eggs are overcooked. Follow the 12-minute rule and use an ice bath.

Storing Deviled Eggs

Deviled eggs should be stored in an airtight container in the refrigerator. They stay fresh for up to 2 days. If preparing ahead, store the egg whites and filling separately, then assemble before serving.

Serving Suggestions

  • As a Party Appetizer – Arrange on a platter with fresh herbs.
  • Brunch Addition – Serve alongside toast, fresh fruit, and coffee.
  • Healthy Snack – Packed with protein and flavor, perfect for a quick bite.
  • Holiday Favorite – A must-have for Easter, Thanksgiving, and Christmas gatherings.

Conclusion

Deviled eggs are a timeless, versatile dish that can be customized to suit any taste. Whether you prefer the classic recipe or enjoy experimenting with bold flavors, these creamy and flavorful bites are sure to be a crowd-pleaser. Try out different variations, follow our expert tips, and impress your guests with the perfect deviled eggs!

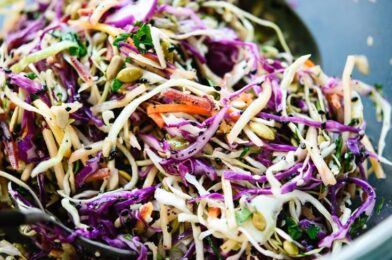
Coleslaw Recipe: The Ultimate Guide to the Perfect Crunchy and Creamy Slaw

Coleslaw is one of the most beloved side dishes, offering a perfect balance of crunch, creaminess, and tangy flavor. Whether served with barbecue, fried chicken, burgers, or as a refreshing salad, coleslaw has become a staple in cuisines worldwide. This post will guide you through the best coleslaw recipe, including different variations, expert tips, and serving suggestions. Let’s dive in!

A Brief History of Coleslaw

The name “coleslaw” originates from the Dutch term koolsla, which means “cabbage salad.” The dish dates back to the 18th century when Dutch settlers brought it to America. Over time, coleslaw evolved into various versions, incorporating different dressings and ingredients depending on regional preferences.

Why You’ll Love This Recipe

  • Quick & Easy: Ready in just a few minutes with minimal ingredients.
  • Crunchy & Creamy: The perfect balance of textures.
  • Versatile: Works as a side dish, sandwich topping, or salad.
  • Customizable: Make it tangy, sweet, or spicy based on your preference.

Classic Creamy Coleslaw Recipe

Ingredients:

  • 1 medium head of green cabbage (shredded)
  • 1 cup shredded carrots
  • ½ cup mayonnaise
  • 2 tablespoons apple cider vinegar
  • 1 tablespoon Dijon mustard
  • 1 tablespoon sugar (or honey)
  • ½ teaspoon celery seed (optional)
  • Salt and black pepper to taste

Instructions:

  1. Prepare the Vegetables: Thinly shred the cabbage and carrots using a sharp knife, mandoline slicer, or food processor.
  2. Make the Dressing: In a large mixing bowl, whisk together mayonnaise, apple cider vinegar, Dijon mustard, sugar, celery seed, salt, and pepper.
  3. Combine: Add the shredded cabbage and carrots into the bowl and toss everything until well coated.
  4. Chill: Cover and refrigerate for at least 30 minutes before serving. This allows the flavors to blend beautifully.
  5. Serve: Enjoy as a side dish or as a topping for sandwiches and tacos.

Variations of Coleslaw

Coleslaw is incredibly versatile, and you can customize it based on your taste preferences or dietary needs. Here are some popular variations:

1. Vinegar-Based Coleslaw (No Mayo)

If you prefer a lighter coleslaw without mayonnaise, try this vinegar-based version:

  • Replace mayonnaise with ¼ cup olive oil.
  • Increase the vinegar to ¼ cup.
  • Add a tablespoon of honey or maple syrup for sweetness.
  • Use red cabbage for a vibrant color contrast.

2. Spicy Coleslaw

For a bit of heat, add:

  • 1 teaspoon of sriracha or hot sauce to the dressing.
  • ½ teaspoon of cayenne pepper.
  • Substitute half of the mayonnaise with Greek yogurt for a tangy kick.

3. Sweet Southern Coleslaw

Southern-style coleslaw is a favorite at BBQs and pairs wonderfully with smoked meats.

  • Add ¼ cup buttermilk to the dressing for a richer taste.
  • Use ½ cup sugar instead of 1 tablespoon.
  • Mix in 1 tablespoon of grated onion for added depth.

4. Asian-Inspired Coleslaw

For an Asian twist, swap some traditional ingredients:

  • Use rice vinegar instead of apple cider vinegar.
  • Replace mayonnaise with toasted sesame oil.
  • Add ½ cup shredded purple cabbage for color.
  • Sprinkle toasted sesame seeds and chopped peanuts on top.

Tips for the Best Coleslaw

  1. Shred the Cabbage Thinly: The thinner the slices, the better the texture.
  2. Use Fresh Ingredients: Fresh cabbage and carrots make a huge difference in crunch and flavor.
  3. Let It Rest: Coleslaw tastes better when it sits for at least 30 minutes to allow the flavors to meld.
  4. Balance the Dressing: Adjust the sweetness, tanginess, or creaminess according to your preference.
  5. Keep It Crisp: If making ahead, store the dressing separately and mix just before serving.

What to Serve with Coleslaw

Coleslaw is the perfect companion to many dishes. Here are some great pairing ideas:

  • BBQ Ribs or Pulled Pork: The tangy crunch complements smoky meats beautifully.
  • Fried Chicken: Adds a refreshing contrast to crispy fried chicken.
  • Fish Tacos: Pairs well with grilled or fried fish for a delicious taco filling.
  • Burgers & Sandwiches: Use it as a topping to enhance texture and flavor.
  • Grilled Meats: Serve alongside steak, chicken, or shrimp.

How to Store Coleslaw

  • Refrigerate: Store in an airtight container in the fridge for up to 3 days.
  • Avoid Freezing: The mayo-based dressing does not freeze well and will become watery when thawed.
  • Refresh Leftovers: If the coleslaw releases too much liquid, simply drain excess moisture and stir before serving.

Frequently Asked Questions

Can I Make Coleslaw Ahead of Time?

Yes! You can prep the vegetables and dressing separately and mix them before serving to keep it fresh.

How Do I Prevent Coleslaw from Getting Watery?

Salting the cabbage before mixing can help. Sprinkle a little salt over the shredded cabbage and let it sit for 10 minutes before rinsing and drying.

What’s the Best Cabbage for Coleslaw?

Green cabbage is the classic choice, but you can use red cabbage or Napa cabbage for variety.

Final Thoughts

Coleslaw is an easy and delicious dish that adds crunch, flavor, and color to any meal. Whether you prefer the classic creamy version or an adventurous twist, this guide gives you everything you need to make the perfect coleslaw at home. Try it out, experiment with different flavors, and enjoy this timeless dish!

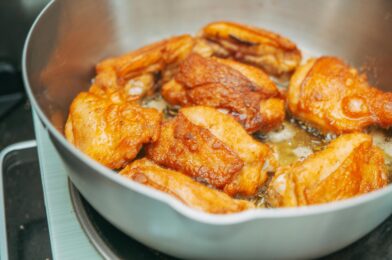
The Ultimate Guide to Chicken Thigh Recipes: Delicious, Juicy, and Flavorful Dishes

Chicken thighs are one of the most versatile, budget-friendly, and flavorful cuts of chicken. Whether you love them roasted, grilled, baked, or slow-cooked, chicken thighs bring a juicy, rich taste that’s hard to beat. Unlike chicken breasts, thighs contain more fat, which helps retain moisture and enhances the flavor.

In this ultimate guide, we’ll explore everything you need to know about cooking with chicken thighs, including their benefits, essential cooking tips, and a variety of delicious recipes.

Why Choose Chicken Thighs?

  1. More Flavorful – The extra fat content compared to chicken breasts results in a juicier and richer taste.
  2. Budget-Friendly – Chicken thighs are generally more affordable than chicken breasts.
  3. Versatile Cooking Options – Whether you fry, bake, grill, or braise them, chicken thighs always turn out delicious.
  4. Tender and Juicy – They remain moist and tender even after prolonged cooking.
  5. Nutrient-Rich – High in protein and essential vitamins like B6 and B12.

How to Cook Chicken Thighs Perfectly

Before diving into recipes, let’s go over some essential tips for getting the best results when cooking chicken thighs.

1. Choosing Between Bone-In or Boneless

  • Bone-in, skin-on thighs provide extra flavor and crispiness.
  • Boneless, skinless thighs cook faster and are great for stir-fries and quick meals.

2. Cooking Methods

  • Searing: Gives a crispy outer layer while keeping the inside juicy.
  • Baking: Cooks evenly and allows for deep flavors with marinades.
  • Grilling: Adds a smoky, charred taste to the meat.
  • Slow Cooking: Makes them fall-apart tender with minimal effort.

3. Seasoning and Marinades

Marinate chicken thighs for at least 30 minutes to enhance their flavor. Some great seasoning ideas include:

  • Garlic, lemon, and herbs
  • Soy sauce, ginger, and honey
  • Smoky paprika, cumin, and chili powder
  • Italian seasoning with olive oil and balsamic vinegar

Delicious Chicken Thigh Recipes

1. Garlic Butter Baked Chicken Thighs

A simple yet incredibly flavorful recipe.

Ingredients:

  • 6 bone-in, skin-on chicken thighs
  • 4 cloves garlic, minced
  • 4 tbsp butter, melted
  • 1 tsp paprika
  • 1 tsp salt
  • 1/2 tsp black pepper
  • 1/2 tsp dried thyme
  • 1 tbsp olive oil

Instructions:

  1. Preheat oven to 400°F (200°C).
  2. Heat olive oil in a skillet over medium-high heat. Sear chicken thighs, skin-side down, until golden brown (about 4 minutes).
  3. Transfer chicken to a baking dish. Brush with melted butter and sprinkle with garlic, paprika, salt, pepper, and thyme.
  4. Bake for 30-35 minutes until crispy and cooked through.
  5. Serve with mashed potatoes or roasted vegetables.

2. Honey Soy Glazed Chicken Thighs

This Asian-inspired dish is sweet, savory, and sticky—perfect for serving over rice.

Ingredients:

  • 6 boneless, skinless chicken thighs
  • 1/3 cup soy sauce
  • 1/4 cup honey
  • 2 cloves garlic, minced
  • 1 tsp grated ginger
  • 1 tbsp sesame oil
  • 1 tsp cornstarch mixed with 1 tbsp water (optional, for thickening)
  • Sesame seeds and chopped green onions for garnish

Instructions:

  1. In a bowl, mix soy sauce, honey, garlic, ginger, and sesame oil.
  2. Marinate chicken thighs for at least 30 minutes.
  3. Heat a skillet over medium heat. Sear the chicken on both sides until golden brown (about 4-5 minutes per side).
  4. Pour marinade over the chicken and let it simmer until thickened. If needed, add cornstarch slurry to thicken.
  5. Garnish with sesame seeds and green onions. Serve with steamed rice.

3. Creamy Garlic Parmesan Chicken Thighs

Perfect for a comforting dinner with a rich and creamy sauce.

Ingredients:

  • 6 bone-in, skin-on chicken thighs
  • 4 cloves garlic, minced
  • 1 cup heavy cream
  • 1/2 cup grated Parmesan cheese
  • 1 tsp Italian seasoning
  • 1/2 tsp salt
  • 1/2 tsp black pepper
  • 1 tbsp olive oil
  • 1 tbsp butter

Instructions:

  1. Heat olive oil and butter in a skillet over medium-high heat.
  2. Sear chicken thighs until golden brown on both sides, then remove from the skillet.
  3. Reduce heat to medium, add garlic, and cook for 1 minute.
  4. Pour in heavy cream, Parmesan cheese, Italian seasoning, salt, and pepper. Stir well.
  5. Return chicken thighs to the skillet and let simmer for 15 minutes.
  6. Serve over pasta or mashed potatoes.

4. Spicy Cajun Grilled Chicken Thighs

A smoky and spicy recipe perfect for grilling season.

Ingredients:

  • 6 boneless, skinless chicken thighs
  • 1 tbsp Cajun seasoning
  • 1/2 tsp salt
  • 1/2 tsp black pepper
  • 1 tbsp olive oil
  • 1 tbsp lime juice

Instructions:

  1. Mix Cajun seasoning, salt, pepper, olive oil, and lime juice.
  2. Coat chicken thighs and marinate for at least 30 minutes.
  3. Preheat grill to medium-high heat. Grill chicken for 5-7 minutes per side.
  4. Serve with grilled corn or coleslaw.

5. Slow Cooker BBQ Chicken Thighs

A hands-off recipe for tender, saucy chicken.

Ingredients:

  • 6 bone-in, skin-on chicken thighs
  • 1 cup BBQ sauce
  • 2 tbsp apple cider vinegar
  • 1 tbsp brown sugar
  • 1 tsp smoked paprika
  • 1/2 tsp garlic powder

Instructions:

  1. Mix BBQ sauce, vinegar, brown sugar, paprika, and garlic powder.
  2. Place chicken thighs in the slow cooker and pour sauce over them.
  3. Cook on low for 6-7 hours or high for 3-4 hours.
  4. Serve with cornbread or coleslaw.

Conclusion

Chicken thighs are incredibly versatile, easy to cook, and full of flavor. Whether you prefer them crispy, creamy, grilled, or slow-cooked, there’s a recipe for every occasion. Try out these delicious chicken thigh recipes and elevate your home cooking!

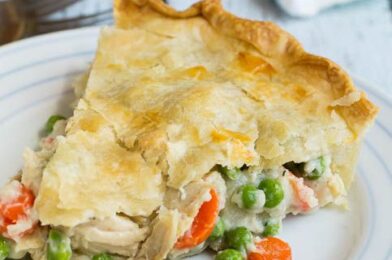
Chicken Pot Pie Recipe: The Ultimate Comfort Food Guide

Introduction

Chicken pot pie is the ultimate comfort food—warm, creamy, and packed with flavor. Whether you’re making it for a cozy family dinner, a special occasion, or just to satisfy a craving, this dish never disappoints. With its flaky crust and rich, savory filling, chicken pot pie is a timeless classic that has been cherished for generations.

In this guide, we’ll take you through everything you need to know about making the perfect chicken pot pie from scratch. From choosing the best ingredients to tips on making a buttery, flaky crust, you’ll find everything you need to create a show-stopping dish.

Let’s get started!

The History of Chicken Pot Pie

Chicken pot pie has roots that trace back centuries. Originating from the Greeks and later evolving through the Romans, the concept of meat encased in a pastry crust has stood the test of time. Early American settlers embraced this dish, adapting it to include local ingredients and seasonings. Today, it remains one of the most beloved comfort foods worldwide.

Ingredients for the Perfect Chicken Pot Pie

For the Pie Crust:

  • 2 1/2 cups all-purpose flour
  • 1 teaspoon salt
  • 1 cup unsalted butter, cold and cubed
  • 6-8 tablespoons ice water

For the Filling:

  • 2 cups cooked chicken, shredded
  • 1 cup carrots, diced
  • 1 cup peas
  • 1/2 cup celery, diced
  • 1/3 cup unsalted butter
  • 1/3 cup all-purpose flour
  • 1/2 teaspoon salt
  • 1/4 teaspoon black pepper
  • 1/4 teaspoon dried thyme
  • 1 3/4 cups chicken broth
  • 2/3 cup whole milk

Optional Ingredients for Extra Flavor:

  • 1/4 teaspoon garlic powder
  • 1/4 teaspoon onion powder
  • 1/4 teaspoon smoked paprika
  • Fresh parsley for garnish

Step-by-Step Guide to Making Chicken Pot Pie

Step 1: Prepare the Pie Crust

  1. In a large bowl, combine the flour and salt.
  2. Add the cubed butter and use a pastry cutter or your hands to mix until the mixture resembles coarse crumbs.
  3. Gradually add ice water, one tablespoon at a time, until the dough comes together.
  4. Divide the dough into two equal portions, shape into discs, wrap in plastic wrap, and refrigerate for at least 30 minutes.

Step 2: Cook the Filling

  1. In a large skillet, melt the butter over medium heat.
  2. Add the flour, salt, pepper, and thyme, stirring continuously to form a roux.
  3. Slowly whisk in the chicken broth and milk, cooking until the mixture thickens.
  4. Add the cooked chicken, carrots, peas, and celery. Stir until everything is well coated in the sauce.
  5. Remove from heat and set aside.

Step 3: Assemble the Pie

  1. Preheat the oven to 400°F (200°C).
  2. Roll out one portion of the dough on a floured surface to fit a 9-inch pie pan.
  3. Place the dough in the pan and press gently to fit.
  4. Pour the filling into the crust, spreading evenly.
  5. Roll out the second dough disc and place it over the filling.
  6. Trim the edges, seal, and crimp with a fork or your fingers.
  7. Cut a few small slits in the top crust to allow steam to escape.

Step 4: Bake the Pie

  1. Place the pie on a baking sheet to catch any spills.
  2. Bake for 30-35 minutes, or until the crust is golden brown.
  3. Let the pie cool for 10-15 minutes before serving.

Tips for the Best Chicken Pot Pie

  • Use high-quality butter: A rich, flaky crust starts with high-quality butter.
  • Don’t overwork the dough: Overmixing can lead to a tough crust.
  • Let the filling cool slightly: A piping hot filling can make the bottom crust soggy.
  • Experiment with herbs: Thyme, rosemary, and sage add amazing depth of flavor.
  • Use a mix of vegetables: Customize your filling with mushrooms, potatoes, or corn.

Variations of Chicken Pot Pie

1. Classic Chicken Pot Pie

This is the traditional version with a double crust and creamy filling.

2. Skillet Chicken Pot Pie

Instead of baking in a pie dish, make a stovetop version using a skillet and biscuit topping.

3. Mini Chicken Pot Pies

Use muffin tins to create single-serving pot pies—perfect for meal prep or parties.

4. Healthy Chicken Pot Pie

Swap out heavy cream for low-fat milk and use whole wheat crust for a lighter option.

5. Gluten-Free Chicken Pot Pie

Use a gluten-free flour blend for the crust and substitute cornstarch for thickening the filling.

Storing and Reheating Chicken Pot Pie

Refrigeration

Store leftovers in an airtight container in the refrigerator for up to 4 days.

Freezing

Wrap the entire pie in plastic wrap and foil, then freeze for up to 3 months.

Reheating

  • Oven: Bake at 350°F (175°C) for 20 minutes.
  • Microwave: Heat in 30-second intervals until warm.

Conclusion

Chicken pot pie is a timeless dish that brings warmth and comfort with every bite. Whether you follow the classic recipe or add your own twist, this dish is guaranteed to satisfy. Try making it today and enjoy a homemade meal that’s rich in flavor and nostalgia!